Set up VSCode
We recommend using the Kolo Web app (accessible via localhost:8000/_kolo/) instead of the Kolo VSCode extension. Learn more
Setting up VSCode
Make sure to follow the instructions in Trace a Django request to set up Kolo in your Django app. This includes
pip install kolo, adding"kolo.middleware.KoloMiddleware", and making a request with Kolo enabled.Install the Kolo VSCode extension from the VSCode Marketplace.
Kolo will show up with an icon in the left sidebar in VSCode:
After clicking on the Kolo icon and opening Kolo within VSCode, follow the instructions to login and confirm your email.
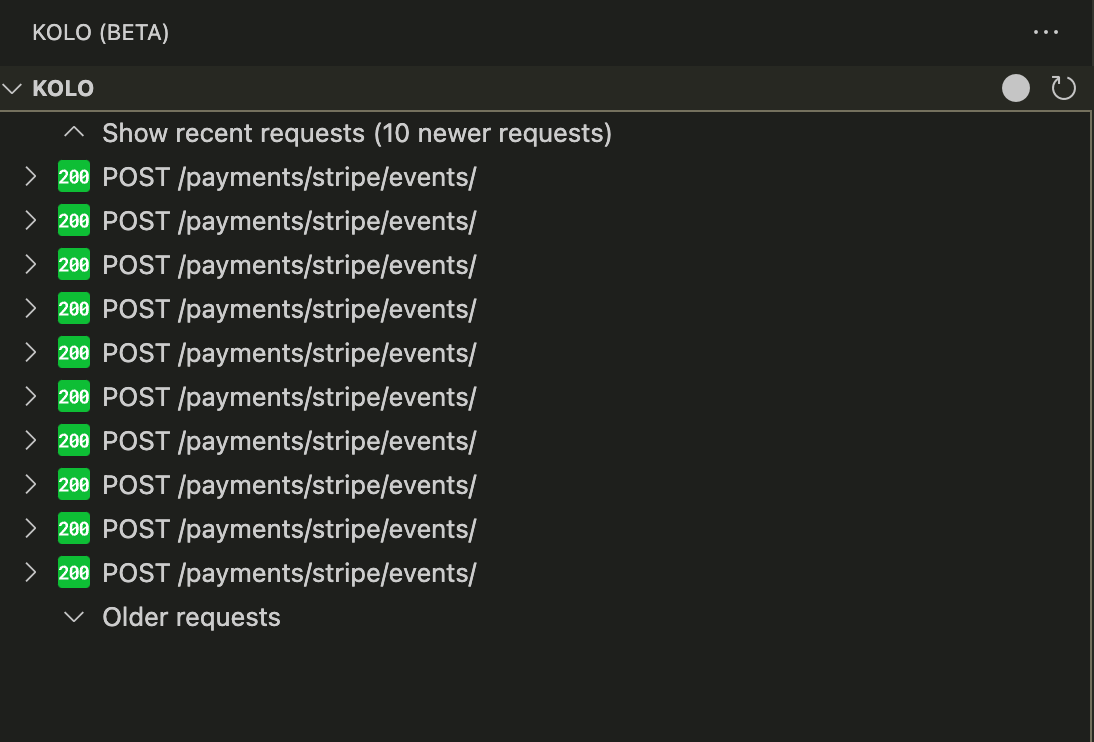
In VSCode, Kolo is available via the sidebar menu. Once clicked, Kolo shows the requests that your Django app recently served:
From this view, you can start exploring your requests and what happened within them. Almost every item in this list is expandable, clickable, and will let you dig into the details.
Inline annotations
To enable the inline code annotations for a specific request, click on the top level item in the list of recent requests. You should see a little confirmation message pop up, and then your code will be annotated with inline function arguments, return values, and local variables.

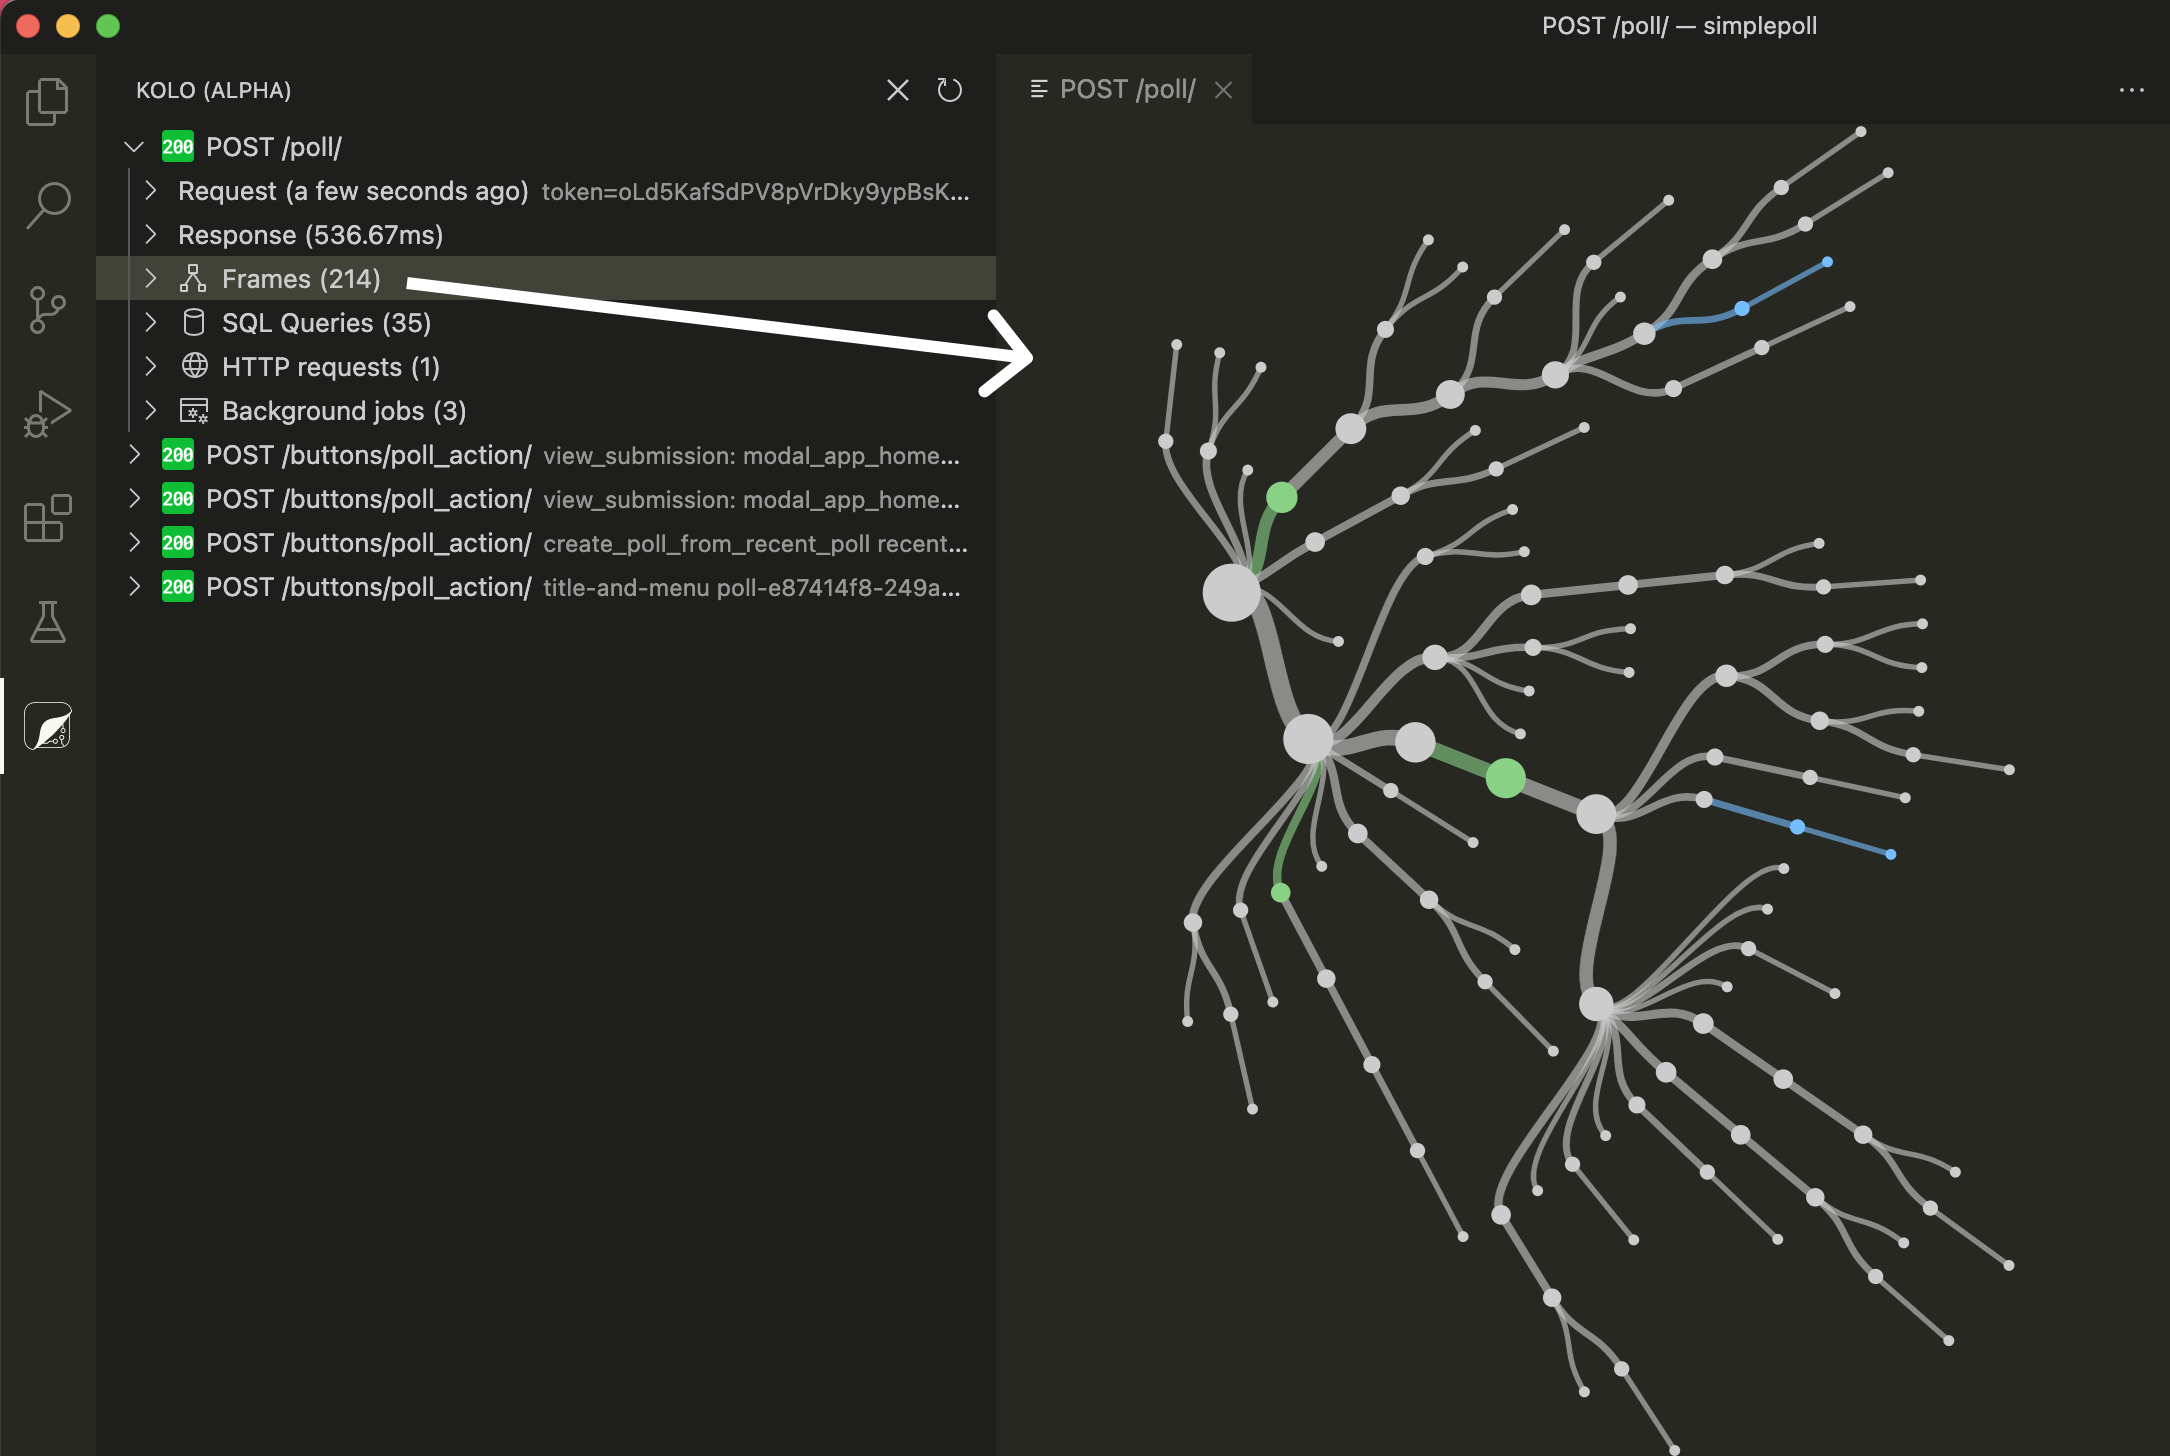
Frame visualization
Click on “Frames” for a specific request, and the frame visualization will open up:
Configuring the VSCode Extension
The Kolo VSCode extension has a number of settings and configuration options.
Path to Kolo Directory
If your VSCode workspace folder doesn’t contain the manage.py file (and the adjacent automatically generated .kolo directory) at the top level, then you will need to set the “Path To Kolo Directory” setting in VSCode:

For example, you might have a top level VSCode workspace called “myproject” which has a backend folder that contains your Django app. If backend is the folder that includes your manage.py file and the .kolo directory, then the setting you need to set here is: backend.
Custom request description
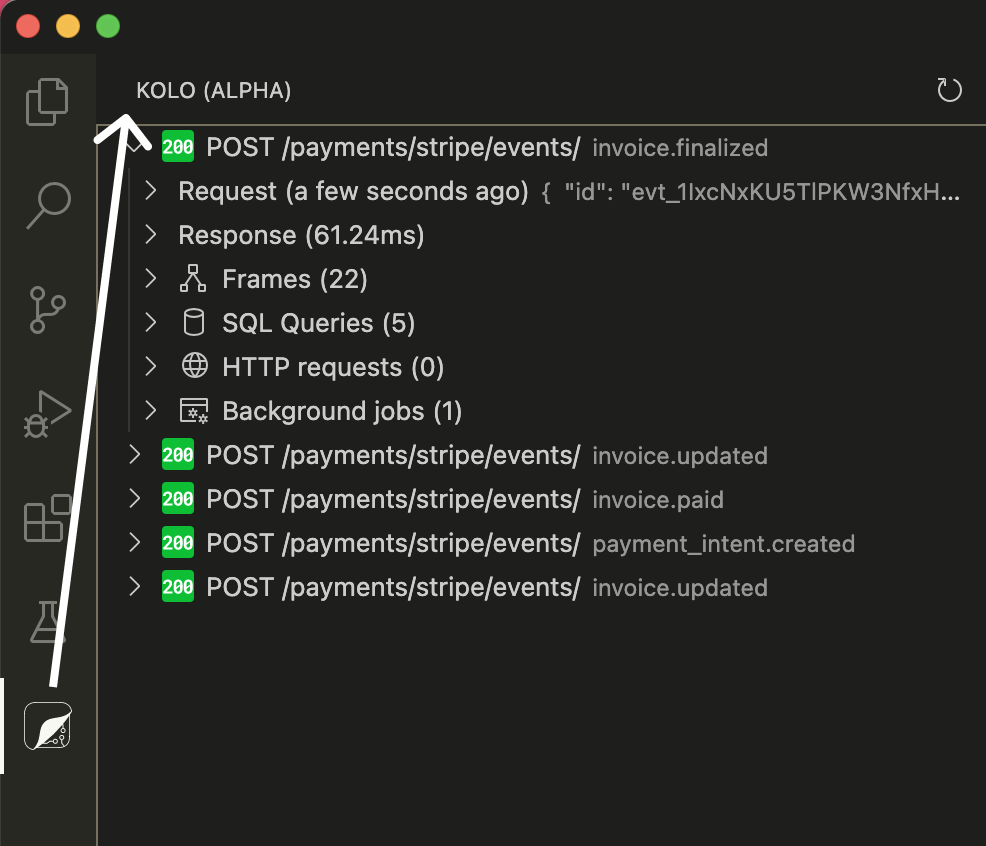
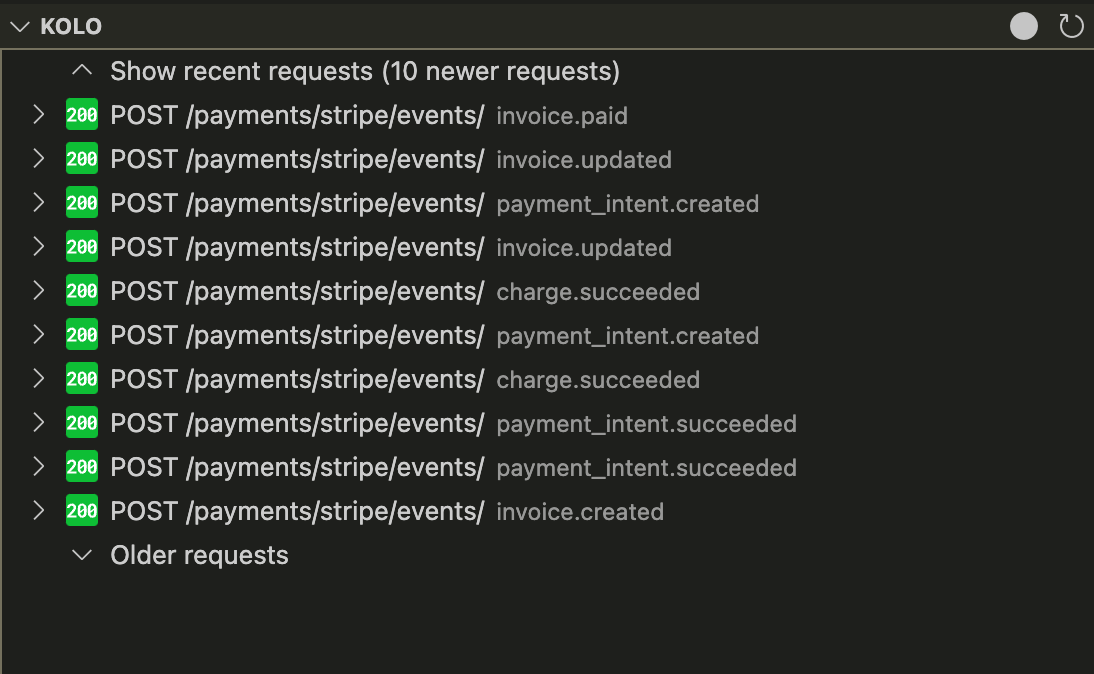
In some cases, just seeing the path of the HTTP request in the sidebar is not sufficient for identifying a request. Say, for example, that your Django app is processing webhook events from Stripe. All those events will arrive at the same path in your app, making it difficult to distinguish different types of events.
By default, a set of webhook events from Stripe will look like this:
But if we have the following JavaScript code in our .kolo/request-description.js file:
(function () {
  if (request.headers.hasOwnProperty("Stripe-Signature")) {
    parsed_body = JSON.parse(request.body);
    return {
      description: parsed_body.type,
    };
  }
})();
Then, Kolo will show the Stripe event type for each request, making it much easier to distinguish between the different payloads we received from Stripe :tada:
request-description.js API
Within .kolo/request-description.js, a global request variable is available. The following fields exist on this variable:
  scheme: string;
  body: string;
  method: string;
  path_info: string;
  headers: {
    [key: string]: string;
  };
Kolo expects an object with a top level description key to be returned in request-description.js, the value of which must be a string. So, for example:
return {
  description: "my custom description",
};
If you would like to explicitly not have a description for a request, you can return undefined.
Custom request body
request-body.js is a useful tool when you’d like to reshape the arriving request body purely for display purposes within Kolo.
For example, some of the requests a Slack app might receive from Slack have a somewhat unusual format: Slack sends the request with the x-www-form-urlencoded content type containing only a single key called “payload” which then contains a JSON string of the actual payload. This request body can be a bit unwieldy, it would be more convenient to directly interact with the JSON payload. This is exactly what request-body.js can help us achieve.
The following .kolo/request-body.js code converts the payload to just regular JSON for display within Kolo:
(function () {
  if (
    request.body.startsWith("payload=") &&
    request.headers["User-Agent"].includes("Slackbot")
  ) {
    let request_body;
    try {
      request_body = decodeURIComponent(request.body);
    } catch (err) {
      request_body = request.body;
    }
    const unparsed = request_body.replace("payload=", "");
    const parsed_json_body = JSON.parse(unparsed);

    return {
      body: JSON.stringify(parsed_json_body, null, 2),
      language: "json",
    };
  }
})();
request-body.js API
Within .kolo/request-body.js, a global request variable is available. The following fields exist on this variable:
  scheme: string;
  body: string;
  method: string;
  path_info: string;
  headers: {
    [key: string]: string;
  };
Kolo expects an object with a top level body key to be returned in request-body.js, the value of which must be a string:
return {
  body: "my custom body",
};
You may also optionally pass a language key alongside body, which Kolo will pass along to VSCode when viewing the body.
If you would like to explicitly not have a custom request body for a request, you can return undefined.
The code in .kolo/request-body.js executes before request-description.js meaning that your custom request description code can take adavantage of the reshaped body.